Right hand
- Alternate pairs of right-hand fingers evenly and with more economy of movement at a variety of tempi, developing awareness of the difference in sound between apoyando and tirando strokes
- Improve independence of thumb movement and further develop damping techniques
- Adapt right-hand shapes and positions to different functions, including changes of tone colour
- Maintain the balance of sound between thumb and fingers in a variety of arpeggio patterns and song arrangements, beginning to develop an awareness of using the thumb and fingers to control the dynamic levels of individual parts
- Sound three and four notes simultaneously
- Use simple strumming techniques for a wider range of rhythms
- Play with a more satisfying, clear sound across a range of dynamics and with some changes of tone colour
Ask learners to choose a simple chord or chords and develop their own arpeggio patterns, using pima in a range of permutations.
Encourage learners to develop their own song accompaniments using these patterns.
Learners should plant the thumb and fingers individually before each note is played and watch the right hand for signs of unnecessary movement. Highlighting ring-finger notes will help develop melodic projection.
Ask learners to work out and play by ear thumb scales on the lower four strings in keys relevant to the pieces being studied.
Ensure learners listen for unwanted overtones on lower strings (audible as a result of sympathetic vibration) and damp them where possible.
Learners should remind themselves of the key signature before they begin a scale and be able to name each note as it is played.
Ask learners to play a range of patterns and exercises at the sound hole, over the fingerboard (tasto) and at the bridge (ponticello). Lead them in a discussion about the differences in the tone colours.
Ensure that the position of the right shoulder is not affected by any alterations in the position of the hand.
Ask learners to experiment with the angle of the wrist when playing scales or other passages for alternating fingers. Allowing the knuckles and strings to be more aligned may facilitate a more balanced finger action (differences in finger length are a factor here) but care should be taken to avoid any loss of tone quality.
Similar adjustments of the right wrist may also be helpful if, at a later stage, learners have to adapt their technique to accommodate particular nail-shape characteristics.
Ask learners to choose a simple chord or chords and develop their own arpeggio patterns, using pima in a range of permutations.
Encourage learners to develop their own song accompaniments using these patterns.
Learners should plant the thumb and fingers individually before each note is played and watch the right hand for signs of unnecessary movement. Highlighting ring-finger notes will help develop melodic projection.
Show learners how to play three or four notes together (simple chords at first, that include open strings) using pim, pma, pia and pima.
Ask learners to rest the thumb on the fifth string and choose an appropriate two- or three-chord sequence using the upper four strings. Make a three-beat pattern by strumming down with i and m together on beat 1 and up with i and m separately (in either order) on beats 2 and 3.
Encourage learners to explore syncopated patterns, using simple down and up strums with the index finger, as in the following example:
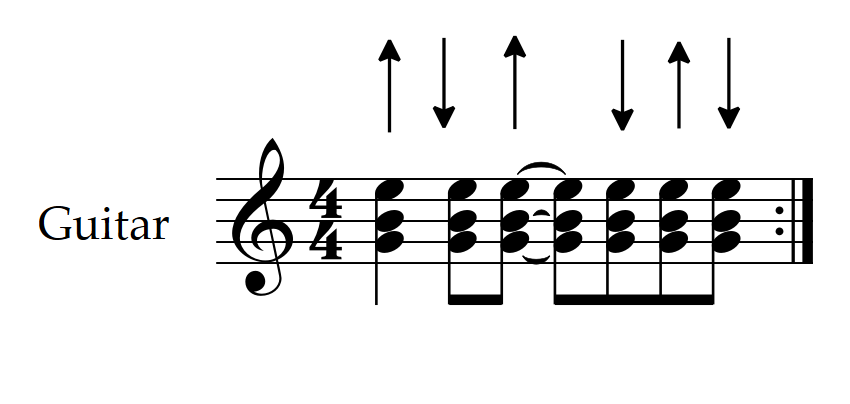
Strummed rhythm patterns like these can be used for song accompaniments.
Explore the progression of this Learning Objective
Continue exploring the current Programme of Study